
DRIVE GEAR AXLE SLEEVES
If your USA Trains diesel is running lumpy at slow speed or frequently derailing, the axle sleeves on the drive gear in the motor block may be split. You should not be able to turn any of the wheels with your fingers. If you can, the wheel will slip under load and may not stay properly gauged.
Although axle assemblies are available from USA Trains, the damaged drive gear axle sleeves can be repaired with a collar of brass tube.
The tube required has a 10mm outside diameter and a 0.45mm thick wall. Great Hobbies here in Ottawa has a metric display of hobby brass and can order the correct tube if they are out of stock. The K&S Engineering stock numbers are 9809 for an aluminum tube and 9828 for a brass tube. In the U.S.A. the McMaster-Carr stock number for the brass tube is 88605K29. Unfortunately they do not ship to Canada unless you are a registered business customer.
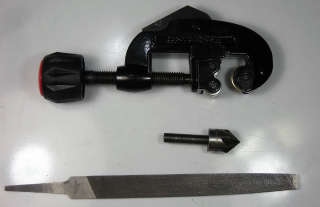
The tools required to complete the repair are: a tube cutter, chamfering tool, drill press, small bench vice, sanding board, and flat metal file.
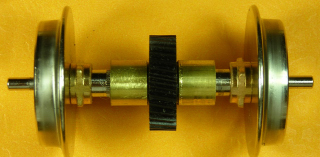
Remove the motor blocks from the diesel, and remove the bottom covers. Lift the axle assembles out, and set the motor blocks aside for now.

Pull the half axles out of the sleeves on the drive gear. Clean the gear with vegetable oil and an old toothbrush to remove any grease. Wash the gear with Dawn dish washing detergent and hot water. Set the gears aside to dry.
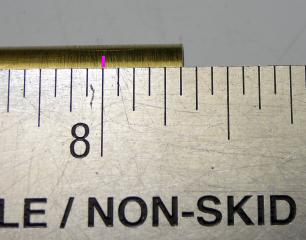
Place a pencil mark 5/16ths of an inch from each end of the 10mm brass tube.
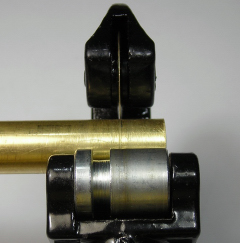
Place the tube in the cutter with the blade on the mark. Snug the cutter down, but not too tightly. Holding the tube firmly, make one turn around the tube with the cutter. Snug the cutter down, and make another turn around the tube. After the third time, inspect the tube to ensure the blade has made a groove on the mark and not a spiral thread. Continue the process until the brass collar drops free of the tube.
Repeat the process until eight collars have been cut.
Sand the edges of the collars smooth on a piece of fine emery paper. A sanding block works well for this purpose. A sanding block is simply a 8 1/2 inch by 10 1/2 inch piece of 3/4 inch thick MDF with a piece of fine emery cloth fastened to it with spray glue. Once the glue has dried the edges of the emery cloth are trimmed flush against the edges of the MDF, and non-slip feet are added.
Mount the chamfering tool in a drill press. Use it to bevel the inside edges of the brass collars to remove any flash.
Use the same tool to bevel the inside edges of the axles sleeves on the plastic drive gears to make the axles easier to install.
Remove the chamfering tool, and place an axle sleeve of a drive gear in the drill press chuck. Use a flat metal file to bevel the outside edges of the exposed drive gear axle sleeve to make the brass collars easier to install. Repeat the process for the other seven axle sleeves. Use an old toothbrush to clean any plastic filings from the axle sleeves.
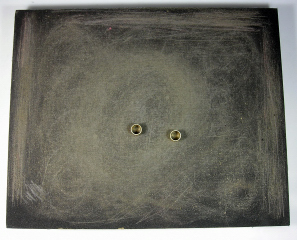
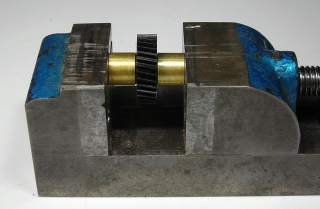
Turn a brass collar onto each of the drive gear axle sleeves. Place the drive gear into a small bench vice, and close the vice until the brass collars are flush with the ends of the plastic axle sleeves.
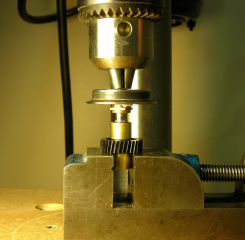
Remove the gear and place it in the vice with one of the axle sleeves and brass collars facing up. Close the vice until the jaws just touch the bottom brass collar. Place the vice on the drill press platform.
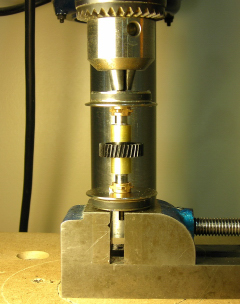
Fasten one of the wheels in the drill press with the inside axle facing down. Use the drill press to push the axle into the repaired plastic drive gear sleeve in the vice until just 1/32nd of an inch of the splines on the axle are showing.
Turn the axle assembly over in the vice. Place the other wheel in the drill press with the inside axle facing down. Use the drill press to push the axle into the other plastic drive gear sleeve until just 1/32nd of an inch of the splines on the axle are showing.
CAUTION: Do not push the wheels beyond the NMRA standard for back-to-back clearance of 1.575 inches. Attempting to draw the wheels back out to widen the back-to-back clearance may break the axle sleeve off the drive gear.
Carefully use the drill press to adjust the back-to-back clearance. The minimum measurement on an Aristo-Craft track and wheel gauge or a caliper can be used to take the measurement.
CAB DOORS
One of my pet peeves is trying to install the miserable little springs that that hold the cab doors closed on USA Trains diesels. They usually stretch somewhat while being installed and do not hold the door closed.
To make matters worse, if you push the door open too far working on the spring installation, at least one of the tiny plastic pins on the doors hinges will shear off. During my 22 years in the large scale trains hobby, I have never seen a diesel cab door open. I wish the manufacturers would save their time and money by molding the doors closed.
Fortunately the plastic hinge pin can be replaced with a piece of a straight pin. The top hinge in the following picture has been repaired that way.
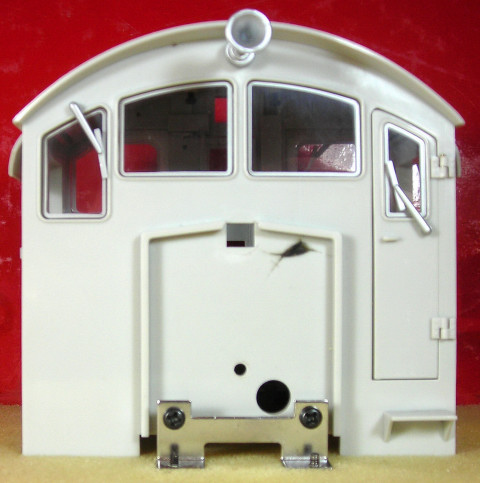
The remainder of the broken plastic pin on the hinge was sanded flat. A hole was then drilled through the hinge with a 1/32nd inch bit in a pin vice.
The door was put back in place. A brass straight pin with a bit of Super Glue under the head was pushed through the hole in the top of the hinge. As the head of the pin and the Super Glue keeps it place, the bottom was cut off with flush cutters.
The little spring was placed in the spares drawer with all the others stretched springs I have removed. The door was then fastened shut with a dab of hot glue on the inside.
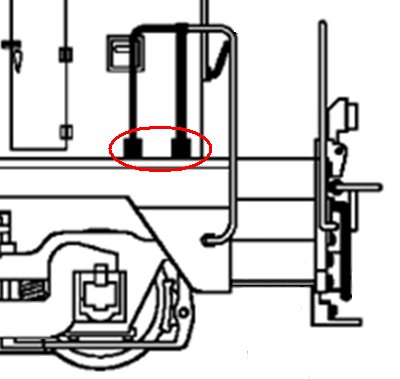
HANDRAIL STANCHIONS
The small metal tabs on the bottom of the stanchions of USA Trains diesel handrails are susceptible to damage. When they break off, they can be replaced by a piece of brass rod bent in an L and soldered inside the channel.
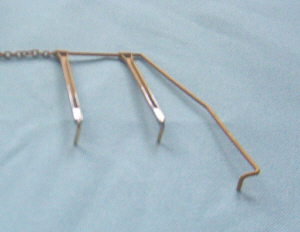
A repaired and painted stanchion is shown in the next photo.
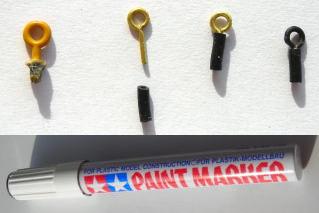
CUTBAR LOOPS
If you are like most people, you will break some of the fine plastic loops that hold the cut bars in place on the pilots of USAT diesels. Fortunately these loops can be replaced with brass loops from the ship building section of a hobby shop.
- The images below are:
- the USA Trains plastic loop for comparison,
- the brass loop with a 5/32 inch length of 22 gauge wire insulation,
- the insulation installed on the loop, and
- the loop painted flat black with a paint marker.
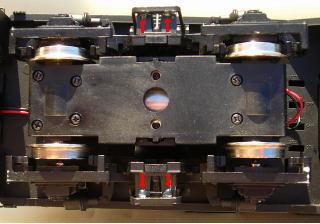
SIDE FRAMES
When installing side frames there are two small plastic pins on the back that fit in two matching holes in the motor block cradle. These line up the side frame and make installing the three screws easier. On a lot of the sideframes I have removed the pins are broken off because people were not aware they were there when re-assembling them.
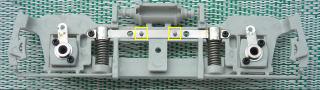
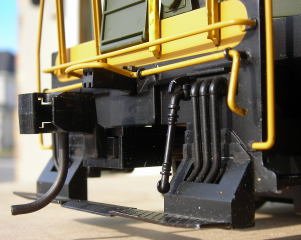
LEAF SPRING STIRRUPS
Tired of losing the leaf spring stirrups off your Geep side frames? You can buy a new set of 4 from USA Trains, but here is an inexpensive way of stopping them from jumping into the weeds.
Place the locomotive on its side on a soft surface taking care not to damage the hand railings. Fasten the bottom of the stirrups to the leaf springs with a couple of spots of hot glue. The dollar store hot glue I used was flexible enough to allow the stirrups to be folded down to access the side frame screws. If it does dry out, it could be removed with needle nose pliers.
PILOT STEPS
The end steps on the bottom of the pilots on GP-9 diesels often get damaged, and the little plastic nubs on the back of them are sheared off in the pilot.
Replacement steps are available from USA Trains. The broken nubs glued in the pilot can be sanded down and drilled with a 5/64 inch drill bit in a pin vise so the new parts can be fastened with CA.
NW-2 HANDRAIL STANCHIONS
On USA Trains NW-2s, the small plastic bases that hold the stanchions of the side handrails to the frame are very susceptible to damage. On the bottom of the bases the little plastic nubs that fit into holes in the frame will often shear off. Ordinarily a nub can be replaced with a small piece of brass rod, but unfortunately the bottoms of these bases are too shallow to hold a piece of rod firmly.
A set of replacement handrails, part number R22-08, can be ordered from USA Trains. Unfortunately they do not come with the bases to mount them. When ordering, please specify that you need the mounting bases.
FASTENING PARTS WITH MULTIPLE SCREWS
In many of the articles posted on this web site you will often read, “When a part is removed, re-fasten the screws back in place so they do not get lost or mixed up with others”. But it appears that “No one ever listens to free advice”. (Words of wisdom from CNR Conductor Frank B Norton circa 1966) After removing the 12 screws from the side frames of a friend’s GP-30, I discovered there were four different kinds and three different lengths. It can only assume that when the locomotive was disassembled all the screws were thrown in one container, and many of the wrong screws used when re-attaching the side frames.
As a result, 5 of the 12 threaded holes for the side frame screws were stripped with the wrong sized screw. To fix the threads, I used a toothpick to line the five holes with gap filling super glue. When the glue had dried, the screws held in the repaired threads.
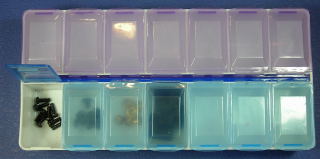
If the screws are only removed for a short period of time, a dollar store pill box can be used to hold them until needed. The ones I use have fourteen locking compartments and a contoured front side that allows small objects to be scooped out easily with a finger. Small locomotive parts and screws can be placed in order of removal in adjacent compartments to make re-assembling the model easier. They could also be used to store small screws or parts. The printing on the see-through lids was easily removed with Methyl Hydrate.
When fastening parts that are held on with several screws, such as locomotive hoods, cabs and fuel tanks; ALL the screws should be placed in their holes with only a few turns before tightening any of them. That allows the part to line up with ALL the screws. If you tightened the screws as you went, the last few could be hard to place and the plastic threads could be stripped.
I have two, number 1, Phillips screwdrivers for working on trains. One is a regular size with a long shaft to reach deep in the holes of USA Trains diesel frames. The other is a hobby sized screwdriver that provides more feedback and prevents me from stripping any threads or rounding out the heads of small screws.
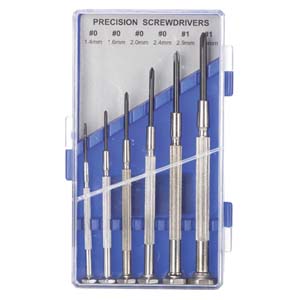
The small #1 (3.8mm) screwdriver is part of a six piece set of precision screwdrivers from The Source in Canada (stock number 640-1962) or from Radio Shack in the USA (stock number 64-2969). I have also found them in Dollarama.
Sometimes the screws that hold a USA Trains diesel shell to its frame can get stuck in those deep holes in the frame. I use a number of 1/8 inch diameter super magnets sealed in the end of a length of shrink wrap to rescue them. If they will not lift out, twisting the shrink wrap counterclockwise usually loosens them enough so they come free.
After I have removed the shell, I enlarge the holes in the frame slightly with a 1/8 inch drill bit. The screws will install easier, and should not hang up on the frame when being removed.
1 comment
This is a good fix. I would like to add that you can also use a vise with a couple pieces of wood between the jaws with holes drilled for the axle ends to press the axles back together. I’m sure a lot of people don’t own a drill press. The axles can also be removed from the plastic axle using a coaxial cable crimper tool and a large flathead screwdriver. The crimper tool I used fit between the plastic axle and brass bearing, then pry between the back of the wheel and crimper tool to remove the axle. I found it didn’t make sense to repair one side of the plastic axle that split and not the other side that hasn’t split yet. Put a collar on the non split side and no repairs will have to be made later. A file can be used to clean up the brass collar rather than a sanding block if needed.