
This article details how to build a 40-foot battery boxcar to power an Aristo-Craft Plug and Play locomotive with a radio control receiver installed.
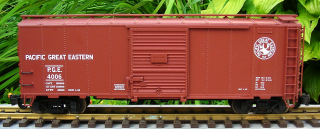
This car utilizes an Aristo-Craft lithium-ion battery pack and is designed to power one Plug and Play locomotive.

The only component required to wire this battery car is a 2-wire connector set available from All Electronics under catalog number CON-240. OVGRS members can purchase the connector set from Paul Norton.

This 2-wire set has the same connectors as the Aristo-Craft lithium-ion battery pack, lithium-ion battery pack charger, and the MU connectors on a Plug and Play locomotive. The battery pack can be charged on-board using the car’s MU connector, or unplugged and replaced with another battery pack to extend run times.
REMOVING THE CAR BODY
Remove the 6 long chrome screws indicated with yellow from the bottom of the car. Open the doors and remove the small screw from the bottom of each door frame.
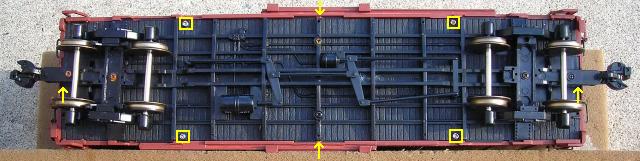
Lift the car body from the frame. If it sticks at the corners, use two, small, flat screwdrivers to gently separate the car body from the frame at one end. Fasten the screws back in the frame and car body, so they do not get lost. Set the car body aside for now.
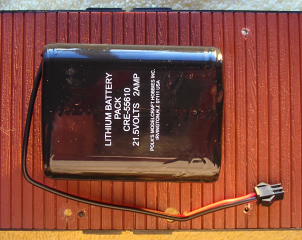
LITHIUM-ION BATTERY PACK
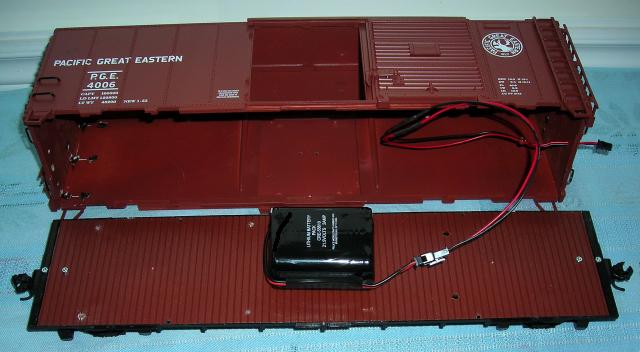
Fasten the lithium-ion, battery pack to the center of the car floor between the doors with a couple of Velcro dots. This will prevent the battery pack from sliding around, but will also allow it to be removed and replaced with another pack to extend run times.
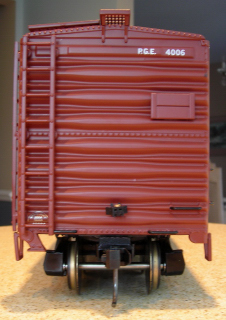
BATTERY CAR MU CONNECTOR
CAUTION: The wire colours on the connector sets sold by All Electronics may not be positioned the same as the wire colours on the connectors on lithium-ion batteries and chargers. If not, click on the following link to see how to switch the positions of the AE Connector Set Wiring so that proper polarity is maintained.
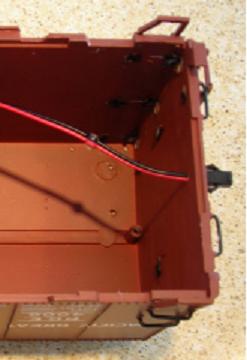
Drill a 1/8th inch hole in the center of the A end of the car body between the first two bottom ribs. The A-end has no brake wheel.
The female half of an All Electronic connector set has the same connector as the Aristo-Craft, lithium-ion battery pack. Slip the wires of the female half of the set through the hole in the car body.
About 2 inches inside the car wall, hold the connector wires together and place a glob of hot glue on them. This will act as stress relief for the wires should the battery car and locomotive become uncoupled during operation. Two inches of slack in the connector wires however, does make it easier to plug in the connecter before the battery car and locomotive are coupled together. The excess wire can be pushed back into the battery car after coupling so it does not get dragged or become entangled in the couplers.
Some owners also remove the locking tab from the MU connector on their locomotives. If the battery car and locomotive become uncoupled during operation, the connectors will slip apart and the locomotive will stop. Alternatively, the ridge on the inexpensive battery car MU connector could be filed flat, and the locomotive connector left untouched.
Strip 1/4 inch of insulation off the ends of the wires of the female and male halves of the AE connector set. The male half of the set has the same connector as the lithium-ion battery pack charger. Slip a suitable length of shrink wrap up one of the red and one of the black wires. Solder and shrink wrap the wires: red to red and black to black.
Connect the lithium-ion battery pack to the male end of the AE connector set.
That completes the wiring of the battery car.
REASSEMBLING THE CAR
Remove the two small screws from the frame and six long screws from the car body. Place the car body back on the frame and insert the screws.
CHARGING THE LITHIUM-ION BATTERY PACK
If the lithium-ion battery pack has not been charged, plug in a battery charger into the car’s MU connector. A green LED on the charger should light up. Plug the charger into a wall outlet. It will take no more than four hours to charge the battery pack completely, although the voltage should be checked hourly to ensure it does not exceed 25.2 volts. When complete, unplug the charger.
TESTING THE BATTERY CAR
CAUTION It is imperative that the switch on the Plug and Play locomotive be pushed to the battery power setting before the battery car is connected. The switch in this setting isolates the locomotive’s track power pick-ups and prevents battery power from being fed into the tracks. Failure to do so could cause a short and destroy both the locomotive electronics and the battery pack.
Choose any Plug and Play locomotive with a radio receiver installed. Ensure the power switch is pushed to the battery power setting. Connect the MU connectors of the locomotive and the battery car together. If the transmitter is properly linked to the receiver, the screen should indicate LINK OK and the locomotive should respond to the throttle.
CONGRATULATIONS! You now have a car that will let you enjoy all the benefits of battery power and radio control.